| | Torinocator's Back From the Dead (well almost...) 70 Torino GT |  |
|
|
| Author | Message |
|---|
Torinocator

Posts : 125
Join date : 2010-03-09
Age : 60
Location : Out There
| | Subject: Torinocator's Back From the Dead (well almost...) 70 Torino GT Tue Mar 09, 2010 2:38 pm | |
|
Last edited by Torinocator on Wed Mar 10, 2010 11:10 pm; edited 1 time in total | |
|
| | |
Torinocator
Posts : 125
Join date : 2010-03-09
Age : 60
Location : Out There
| | Subject: Re: Torinocator's Back From the Dead (well almost...) 70 Torino GT Wed Mar 10, 2010 8:34 pm | |
| | |
|
| | |
Classic

Posts : 6
Join date : 2010-03-10
| | Subject: Re: Torinocator's Back From the Dead (well almost...) 70 Torino GT Wed Mar 10, 2010 9:23 pm | |
| - Torinocator wrote:
Then it got cold (Fall 2008) and I stopped to figure out how to repair the driver side door jamb. Since then, did you find a way how to repair it? | |
|
| | |
Torinocator
Posts : 125
Join date : 2010-03-09
Age : 60
Location : Out There
| | Subject: Re: Torinocator's Back From the Dead (well almost...) 70 Torino GT Wed Mar 10, 2010 9:34 pm | |
| I am halfway there.
Started teaching myself how to weld in January 2009 till it got warm.
I had to push out the inner skeleton with a 4-ton portapower hydraulic jack and weld the reinforcement plate down to the rocker to get the clearance right so the door gap would be right.
Hang tight and I'll try to post the rest of it for you. | |
|
| | |
Classic
Posts : 6
Join date : 2010-03-10
| | Subject: Re: Torinocator's Back From the Dead (well almost...) 70 Torino GT Wed Mar 10, 2010 9:36 pm | |
| So I guess a good hammer and patience might not be enough.  | |
|
| | |
Torinocator
Posts : 125
Join date : 2010-03-09
Age : 60
Location : Out There
| | Subject: Re: Torinocator's Back From the Dead (well almost...) 70 Torino GT Wed Mar 10, 2010 9:37 pm | |
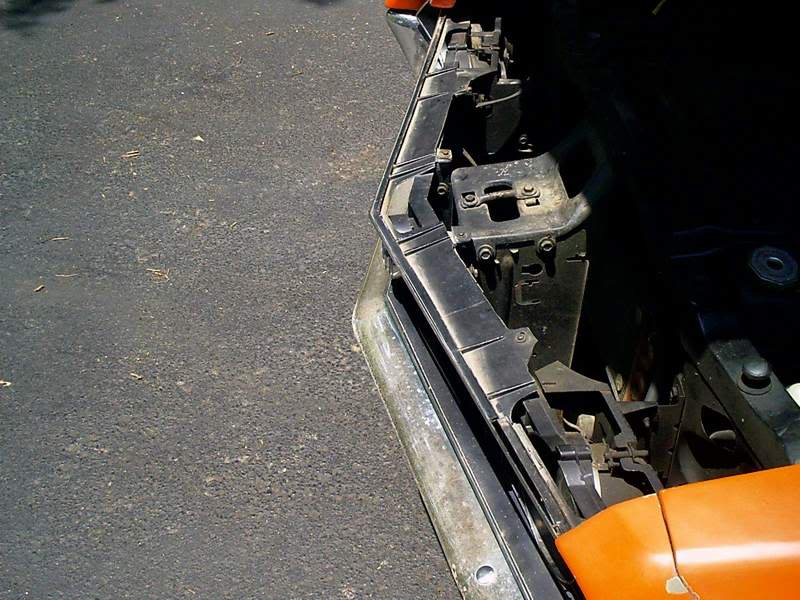
| Used a 4-ton porta power unit to eliminate a 2.5 cm (almost 7/8") gap between the door pillar and the top of the door. 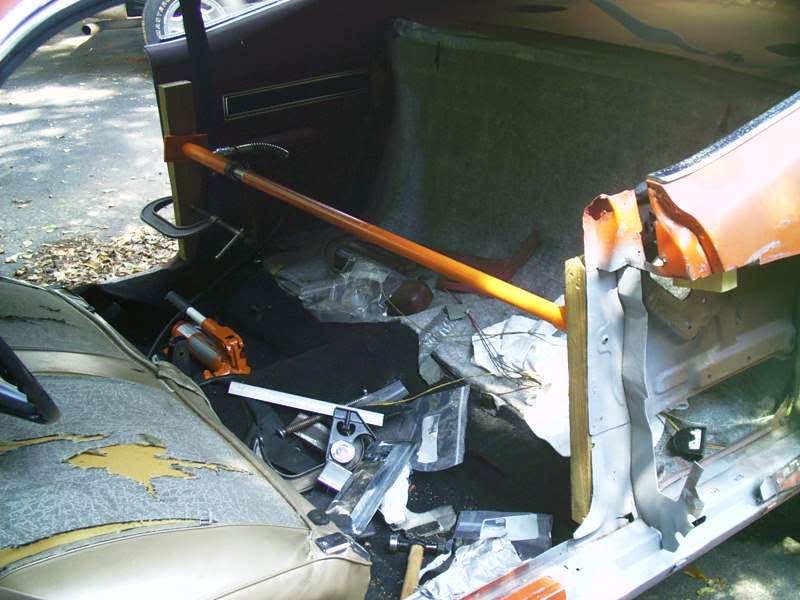 Then I welded the existing lower flanges on the reinforcement plate that lies behind the jamb plate to the rocker to retain the clearance. Joint should be a lot stronger once the jamb plate as well as the replacement quarter panel section is welded to the rocker. 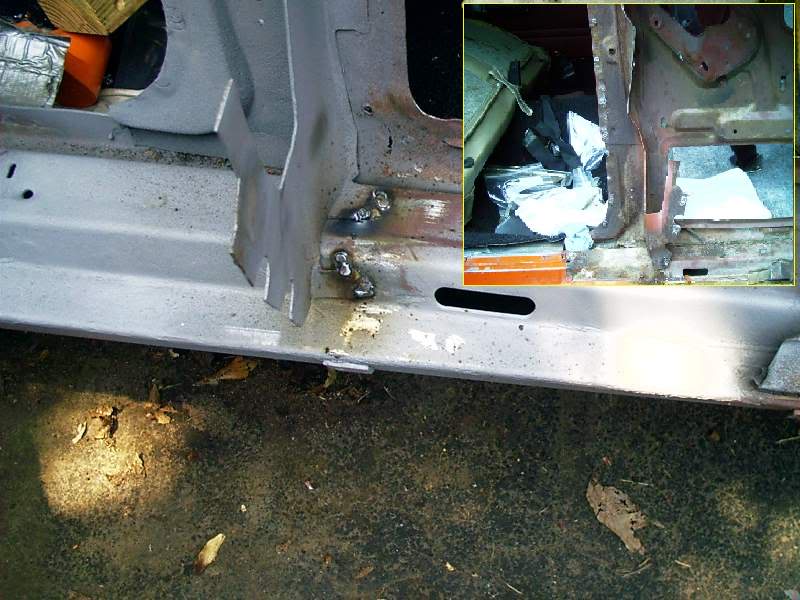 There is still a slightly noticeable gap at the top but I believe I can eliminate this by spreading the two shell wall sections on either side of the quarter window using the spreader jaws that came with the PP. The rest of the reinforcement plate will be welded in with the still-attached jamb plate. The door hinges will need to be adjusted as well. Oddly enough it appears the lower flanges on the reinforcement plate were never welded to the rocker. During the collision this seems to have allowed the reinforcement plate to bend itself almost perpendicular to the car pretty easily. Maybe the tabs were just used for alignment at the factory, I don't know. Until now I had been worried the door wouldn't be flush with the quarter panel when I was finished. Also ground off the spot weld leftovers and straightened the reinforcement plate to where it needed to be. | |
|
| | |
Torinocator
Posts : 125
Join date : 2010-03-09
Age : 60
Location : Out There
| | Subject: Re: Torinocator's Back From the Dead (well almost...) 70 Torino GT Wed Mar 10, 2010 9:38 pm | |
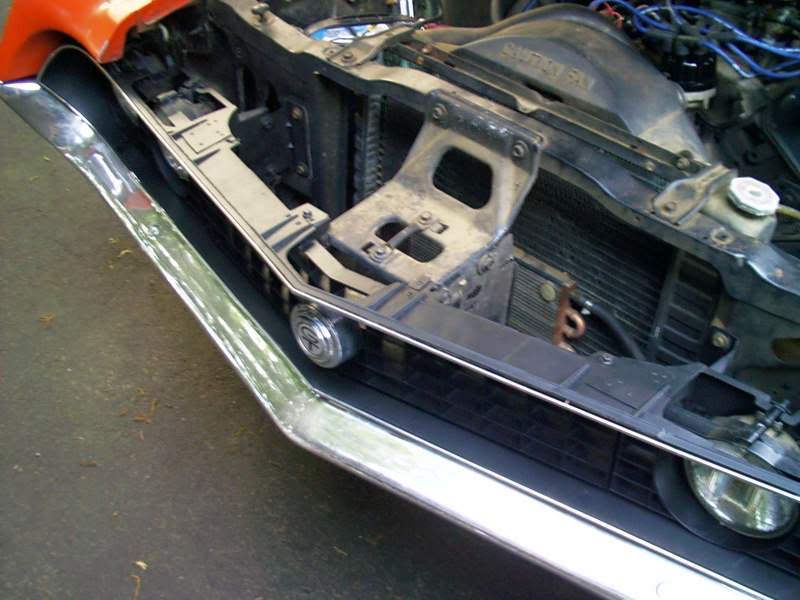
| Got the latch pillar welded in. 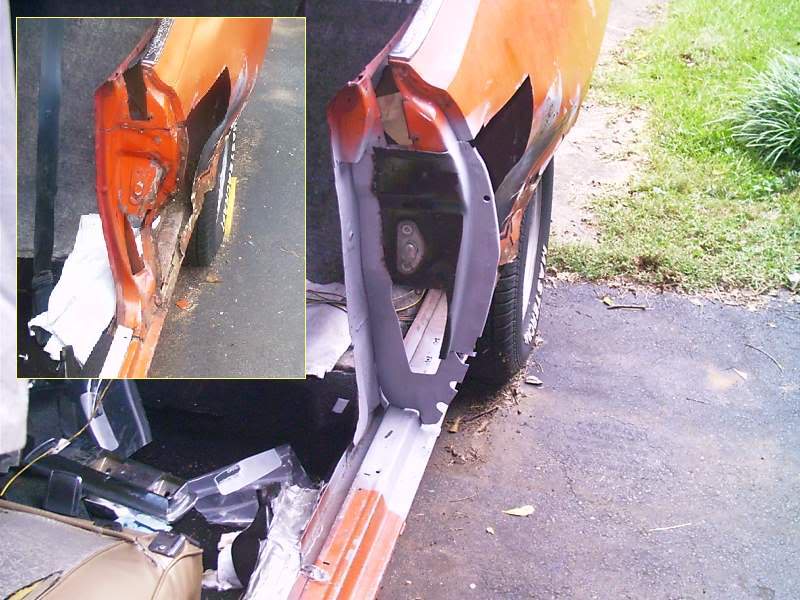  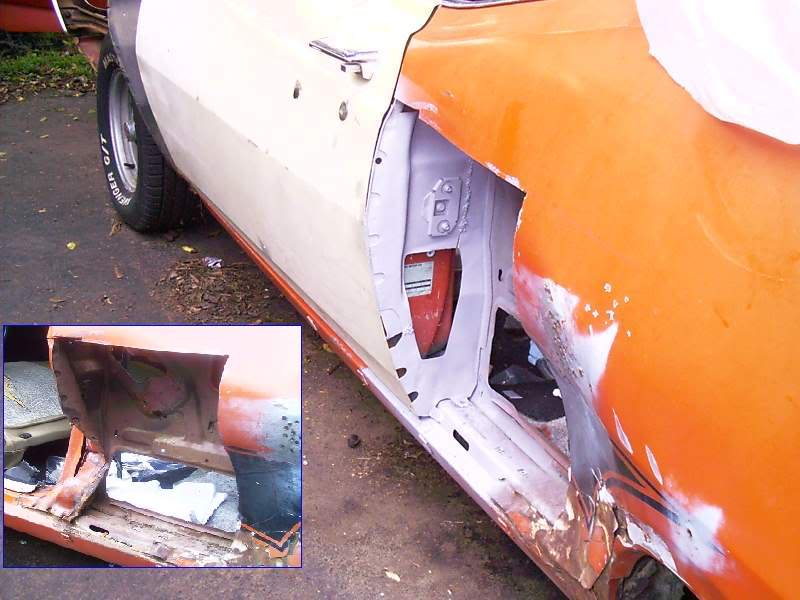 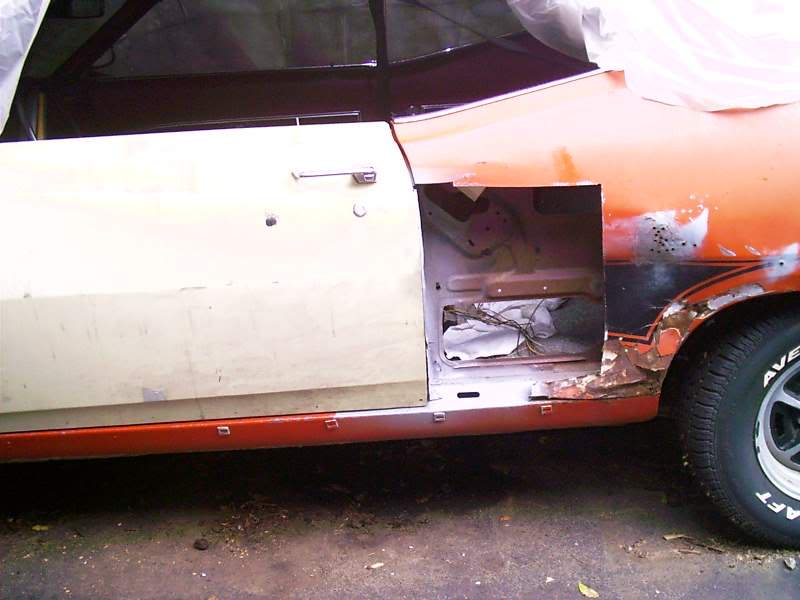 The lower rear section of the door comes in a little too far. Although the reinforcement plate is welded together, the replacement and original door jamb face plates don't meet yet. The new section should come back a few centimeters when I get the last section welded in. Also there is no door edge weatherstripping on the replacement door yet and that will bring it out some. It would normally butt against the rest of the door jamb section that still hasn't been welded in. I made some adjustments on the other set of door hinges that bolt to the door to get the door to line up before the most recent work was done. Should be able to even things out once the door jamb section and weatherstripping is in place. | |
|
| | |
Classic
Posts : 6
Join date : 2010-03-10
| | Subject: Re: Torinocator's Back From the Dead (well almost...) 70 Torino GT Wed Mar 10, 2010 9:43 pm | |
| Impressing skills you've got there. I'm sure when its done you will be quite proud of your ride.
Good luck with the rest!!! | |
|
| | |
Torinocator
Posts : 125
Join date : 2010-03-09
Age : 60
Location : Out There
| | Subject: Re: Torinocator's Back From the Dead (well almost...) 70 Torino GT Wed Mar 10, 2010 9:48 pm | |
| After about 8 Torino man hours, here is my donor quarter panel: 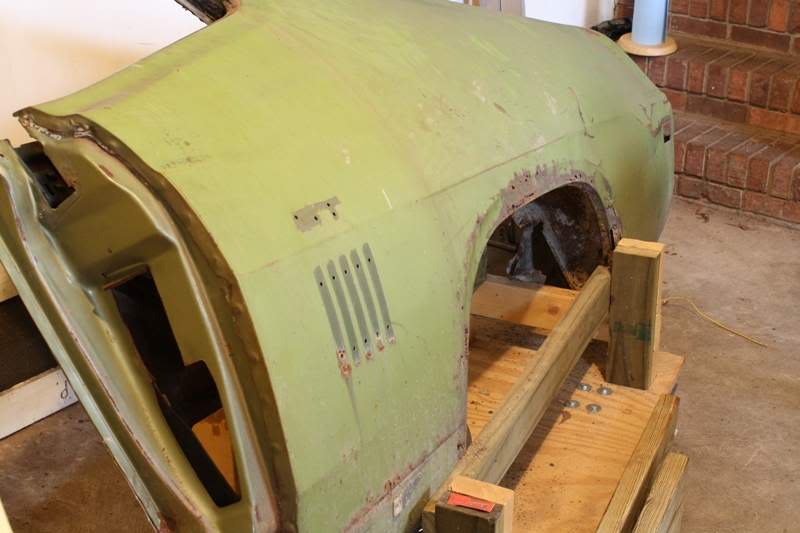 There's a hole in the forward part of the inner fender on my car due to the collision, so this one will come in handy. I am waiting to get the quarter panel cuts made on my car before cutting the inner fender up so I won't make a wasted cut on the donor section.   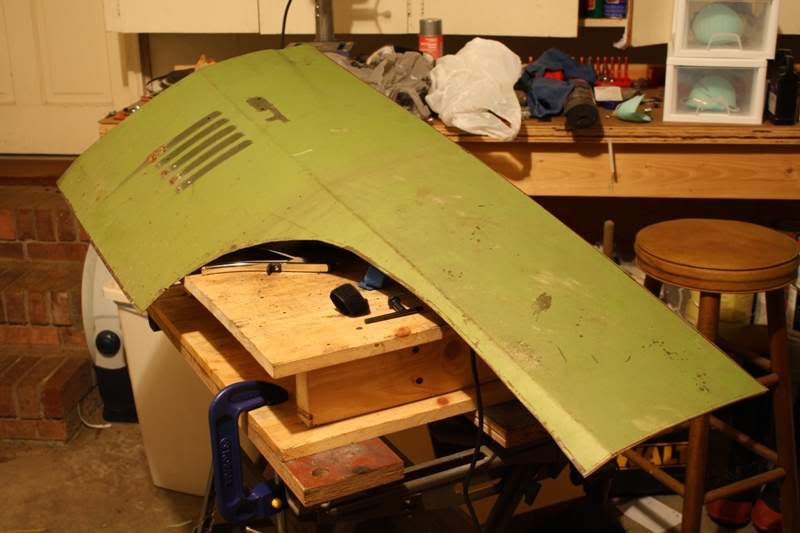  I am also planning to section this donor jamb piece to make it work with what I have already welded on the car. Gonna take a page out of Alan Miller's book and drill the spot welds from the inside part of pillar this time. Not doing that contributed to extra repairs on the first donor piece that caused it to warp. Chalk that one up as a learning experience, I guess. | |
|
| | |
Torinocator
Posts : 125
Join date : 2010-03-09
Age : 60
Location : Out There
| | Subject: Re: Torinocator's Back From the Dead (well almost...) 70 Torino GT Sun Mar 21, 2010 9:35 pm | |
| Drilled spot welds for a few hours today (below). The blue arrows are what has been drilled so far and red ones point to the welds that remain. Unfortunately, there are more welds than arrows.   Finished off the welds that join the jamb plate to the door pillar part of the inner skeleton and the ones that join the plate to the rocker. Also drilled the welds that join the jamb plate to the reinforcement plate behind it. Just the outside spot welds that join the jamb plate to the reinforcement plate are left. I will probably use a wire paint stripper wheel on this part, then grind the rust and quarter panel weld remains down. Then I will re-mark the weld locations with a silver Sharpie and start drilling. It's easier to grind the plate while it's still attached. I figure I have put about 12-16 hours into drilling the jamb plate welds so far. That number includes the drilling I did on it a few weeks ago. | |
|
| | |
mtdewcowboy

Posts : 16
Join date : 2010-03-11
Age : 51
Location : Pampa, Texas
| | Subject: Re: Torinocator's Back From the Dead (well almost...) 70 Torino GT Sun Mar 21, 2010 11:44 pm | |
| You the man  Now can you replace my rear 1/4's both sides  | |
|
| | |
Classic
Posts : 6
Join date : 2010-03-10
| | Subject: Re: Torinocator's Back From the Dead (well almost...) 70 Torino GT Mon Mar 22, 2010 7:45 am | |
| Following this repair rhythm, I'm sure you will enjoy some summer ride soon enough!!!!  | |
|
| | |
Torinocator
Posts : 125
Join date : 2010-03-09
Age : 60
Location : Out There
| | Subject: Re: Torinocator's Back From the Dead (well almost...) 70 Torino GT Sun Apr 04, 2010 4:12 pm | |
| Drilled the rest of the spot welds with the new spot weld drill and removed the donor jamb (below).  Not quite as many bullet holes this time around.   Test fit the donor piece over what I already have welded in (below).  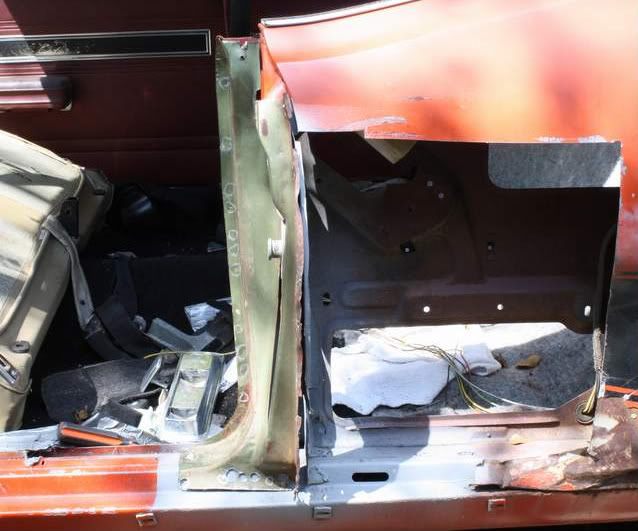 Plenty of cutting, fittng, and surface prep left to do. | |
|
| | |
Sponsored content
| | Subject: Re: Torinocator's Back From the Dead (well almost...) 70 Torino GT | |
| |
|
| | |
| | Torinocator's Back From the Dead (well almost...) 70 Torino GT | |
|